Setting up Pi-Hole on a Raspberry Pi Zero W using SSH
Aim: 🛑 Block all advertisements for all devices on my home WiFi network
Estimated time to complete: Best part of a morning ⏰ depending on how well things go for you i.e. 1.5-3hrs
When the Raspberry Pi Zero came out it hit front pages as the $5 computer and sold out instantly. Here are the specs for the Raspberry Pi Zero:
- 1GHz, single-core CPU
- 512MB RAM
- Mini HDMI and USB On-The-Go ports
- Micro USB power
- HAT-compatible 40-pin header
- Composite video and reset headers
- CSI camera connector
Additional with the Raspberry Pi Zero W:
- 802.11 b/g/n wireless LAN
- Bluetooth 4.1
- Bluetooth Low Energy (BLE)
It genuinely is something to be excited about 😁. I have the slightly more expensive 'W' version - it's twice the price but I'd certainly recommend it for connectivity reasons, otherwise you'll be a little stuck for internet!
Step 1: The Ingredients 🤤 #
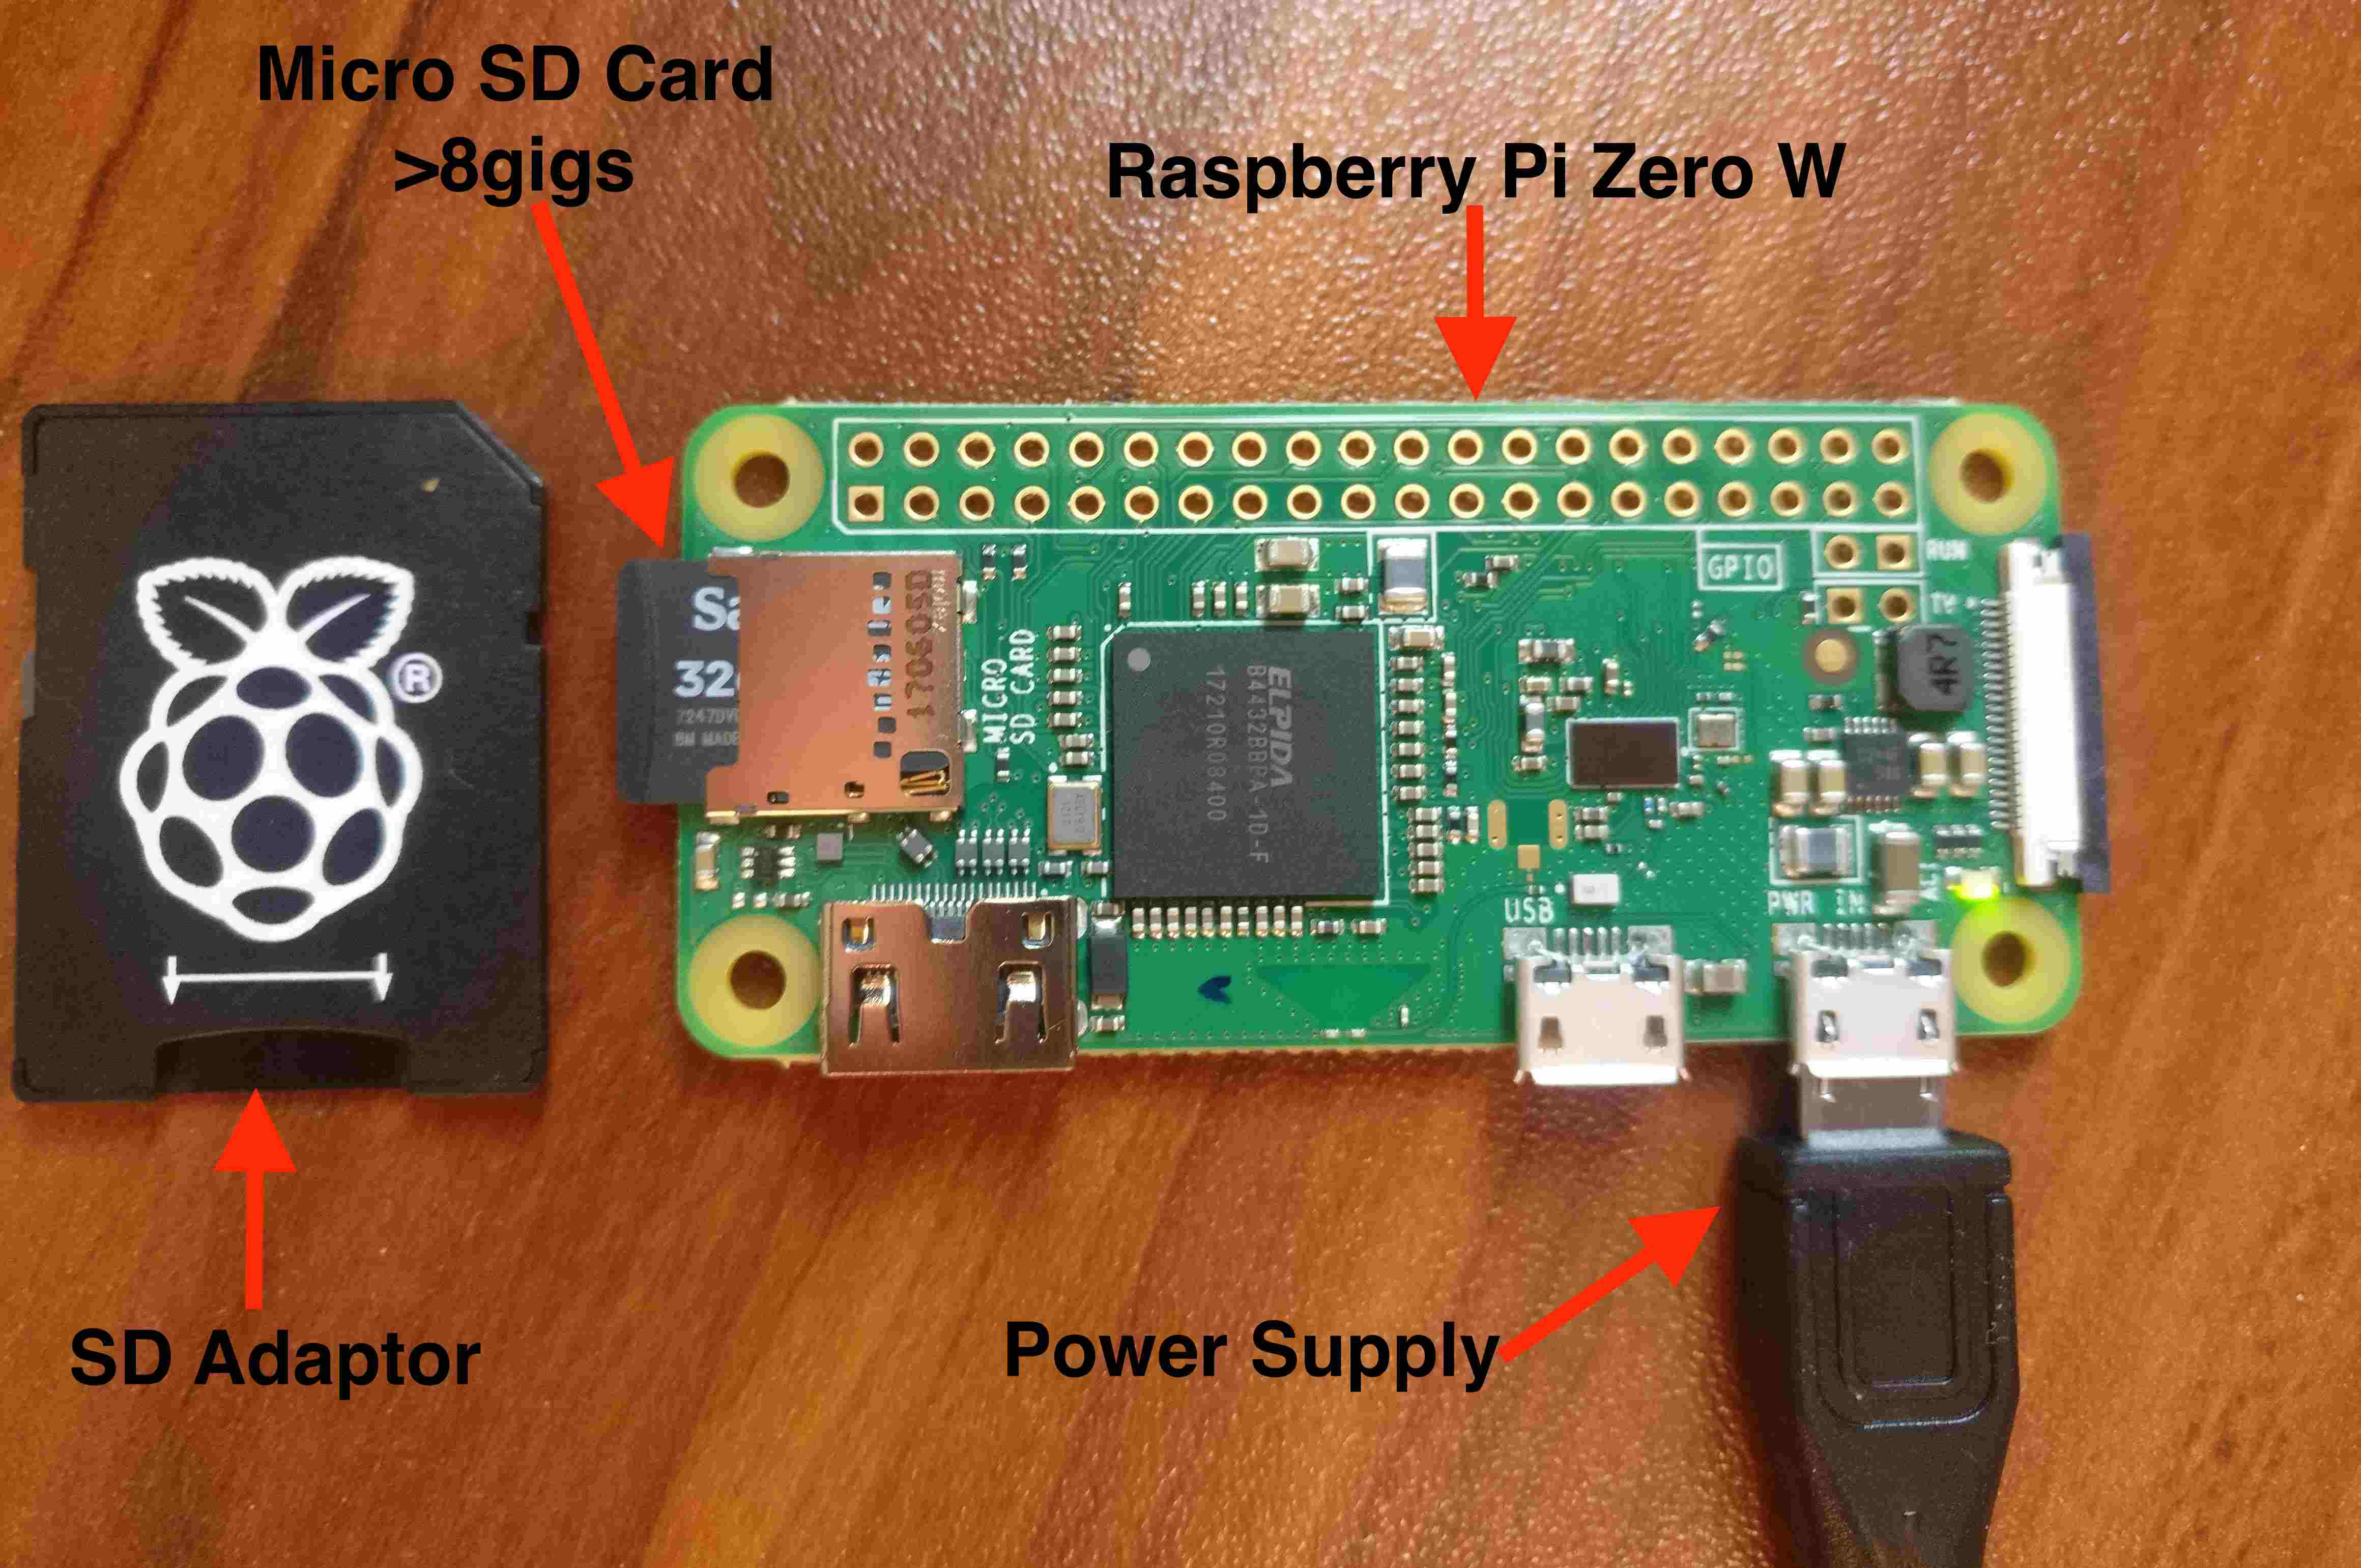
Hardware
Total = $46 (~£26)
Software
Step 2: Setting up the Micro SD with the operating system and connectivity 👨💻 #
The NOOBs micro sd card comes preloaded with raspbian - if you have a blank SD you'll have to find instructions to flash it with Raspbian or a suitable alternative unix flavour. (Re)Connect the flashed SD card to your computer - you should see that it has been recognised as BOOT. In here are a range of files. If you can't already see a wpa_supplicant.conf file, create one in the root of the sd card i.e.BOOT/wpa_supplicant.confand enter the following updating the country and wifi details:
country=GB #your country's 2digit isocode
ctrl_interface=DIR=/var/run/wpa_supplicant GROUP=netdev
update_config=1

network={
    ssid="yourWiFiNetworkName"
    psk="yourWiFiPassword"
}
You can add multiple WiFi networks by repeating the above config with the relevant network credentials.
In the same directory create a blank file ssh, ensuring that there's no extension.
$ touch sshStep 3: 🟢 Turn on the R Pi connect to it and update #
When you first power up the R Pi it will immediately start flashing a small green LED. However, it may take a little while to be able to ssh into the R Pi - allow up to 2 minutes. Of course if you mistyped your WiFi credentials you won't be able to ssh in 🤦♂️. Your network will assign an IP address to the PI but the default hostname is nicer.
$ ssh pi@raspberrypi.localPress enter / answer yes to the prompts. When asked for a password, raspberry is the default.
Run the following command to update the R Pi - this can take around 30mins so take a break at this point 🥱:
$ sudo apt-get update && sudo apt-get upgrade -yThen change password:
$ passwdStep 4: Optional what's the fastest Upstream DNS to select 🏁 #
You need to select an upstream DNS as part of the Pi-Hole install. I wanted to know which one was going to give me the best performance. I found this tool a fork from a broken Google tool that did the job. If you don't have go-lang installed skip this step and choose a DNS provider you're comfortable with - I'd recommend Cloudflare.
$ go get github.com/mwiora/NAMEinator
$ go get github.com/miekg/dns
$ cd ~/go/src/github.com/mwiora/NAMEinator/
$ go build
$ ./NAMEinator
After NAMEinator finishes testing the DNSs for responses you should get a report print out:
LETS GO - each dot is a completed domain request against all nameservers
....................................................................................................
finished - presenting results:

208.67.222.222:
Avg. [88.618011ms], Min. [10ms], Max. [606.061151ms]

156.154.71.1:
Avg. [101.25658ms], Min. [10ms], Max. [2.004470267s]

216.146.35.35:
Avg. [117.992645ms], Min. [10ms], Max. [1.402119851s]

1.0.0.1:
Avg. [50.555672ms], Min. [10ms], Max. [615.732289ms]

1.1.1.1:
Avg. [28.486788ms], Min. [10ms], Max. [329.542844ms]

8.8.8.8:
Avg. [79.401147ms], Min. [10ms], Max. [2.003982489s]

8.8.4.4:
Avg. [65.633078ms], Min. [10ms], Max. [491.458848ms]

Au revoir!
I ran the test a couple of times, Cloudflare 1.1.1.1 came out with the lowest response times both times.
Step 5: Install Pi-Hole 🕳 #
You can run Pi-Hole in a container, however I chose to directly install this for two reasons, I suspect the overhead of Docker would cause performance issues and I won't be utilising the reasons for Docker i.e. I'm unlikely to be putting other software on this R Pi. I went with the simplest option:
$ curl -sSL https://install.pi-hole.net | bashThis will take you through a series of prompts that you mostly will press enter/yes to, select your upstream DNS and once you pop out the other end you will have a print out that looks like:

Take note of the IP address at the bottom of the print out next toPi-hole DNS (IPv4) and the Web Interface password.
Step 6: Configure Your Router 💻 #
If you haven't done much tinkering with routers or consumed a bunch of networking content this can be a strange place full of foreign acronyms. Here's a simple explanation of the three most important for this exercise:
IP address - a device's unique identifier on a network.
Domain Name System (DNS) - Resolves domain names into IP addresses e.g. google.com -> 172.217.169.78.
Dynamic Host Configuration Protocol (DHCP) - a process that occurs on your WiFi network to assign unique IPs. 5 min video explainer.
There are 3 options to get Pi-Hole working outlined in more detail here.
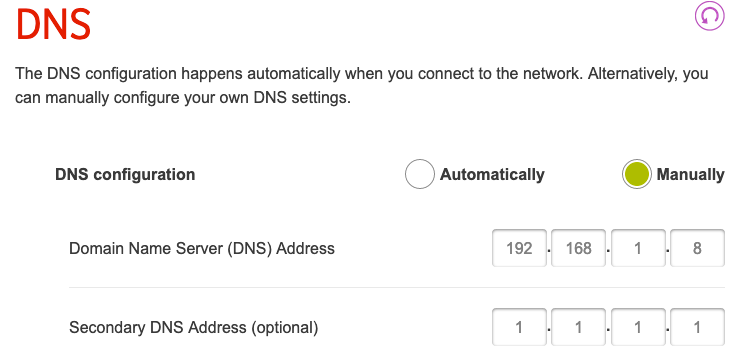
- Configure the DNS to the static IP of the R Pi - I'd recommend putting in a secondary option of Cloudflare in case your R Pi doesn't work. This option means anyone who connects to your device will be ad free without thinking about it. However no amount of rebooting routers and devices, or forgetting my WiFi network and re-adding it managed to get this option to work for me. It should be as simple as setting this option:
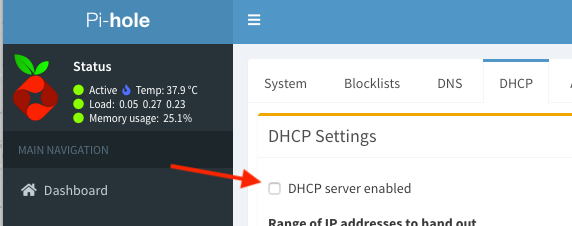
2. Let Pi-Hole takeover the DHCP side of things - this worked easily. Turn off the DHCP setting on your router.

Then turn it on in Settings in the Pi-Hole web interface.
You will also need to assign a static IP for the R Pi. However, if your R Pi stops working, so too will your internet - so I went for the option I least wanted, option 3.
3. Manually enter your Pi-Hole DNS per device 'opt-in' - It means that instead of everyone benefitting automatically without thinking about DNS config when they sign up to your WiFi - you have to manually put in the DNS config. For OSX that looks like this:

For Android. Go to WiFi networks > select 'Modify Network' > 'Advanced options' > Change 'IP settings' to 'Static' > Enter your R Pi IP address.
Pretty instantly I ended up seeing lovely blocked results in my Pi-Hole web interface.

Reference 📚 #
- Pimoroni where I've bought all my R Pi related gear so far and they have great tutorials like this one.
- Helpful guide for the initial micro sd card setup
- Reddit thread on all the rebooting advice - didn't solve it for me.
✍️ Want to suggest an edit? Raise a PR or an issue on Github